Up to Mac OS X 10.3 Panther, viewing images as a slideshow could only quicky be done by a few means. Most of which require complicated processes, eg importing the images into iPhoto and creating a slideshow within it or downloading and using a third party application.
Mac OS X 10.4 Tiger, introduces slideshows on the fly that can be started right inside your Finder itself.
Creating Instant Slideshows In Finder
The process is simple:
- Place your image files in a single folder created on your hard disk;
- Open the folder in Finder;
- Change the Finder view to the List view by selecting the List view button in Finder or pressing Cmd + 2;
- Select the images you wish to include in your slideshow;
- To select multiple images in sequence – click the initial image move your cursor to the last image in the sequence and shift + click; all images between the initial and final image will be selected or;
- To select multiple images not in sequence – Cmd + click on desired images to select several images;
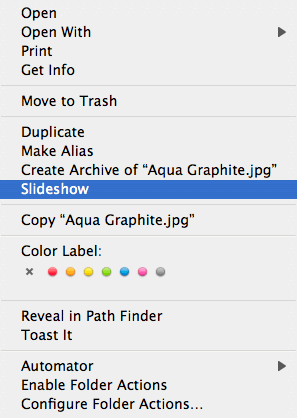
- CTRL + click on any of the highlighted images to summon the option menu;
- select and click the “Slideshow” option to begin your slideshow;
- press any button to stop slideshow.


